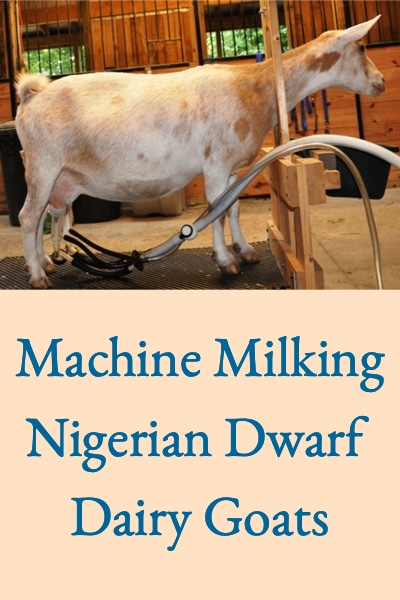
 Machine milking Nigerian Dwarf goats was not something I initially thought was possible because they are so small. So, the first time I saw a Nigerian Dwarf goat being milked using a machine, I was shocked.
We were just beginning to investigate them as a possible breed for Bramblestone Farm, and I’d assumed that they were too small for a milking machine. But, lots of folks use a machine to milk Nigerian Dwarf goats; it can be faster, easier, and more convenient than milking by hand.
As it turns out, it takes longer to write out the steps describing how to milk using a machine than it does to actually do it. It’s an easy process and the steps below describe how it might be done on a small farm or homestead with a few goats to milk.
Large farms with lots of goats generally have bigger, automated setups to milk their goats whereas many small homesteads might choose to just hand milk their goats. It’s a good idea to have an idea of what you plan to do on your farm – it can make a difference in which goats you choose (see Choosing Nigerian Dwarf Does – Hand or Machine Milking?).
How To Machine Milk Goats
The steps we use for milking using a machine (our machine is similar to a DeLaval – any reputable brand should be similar) are:
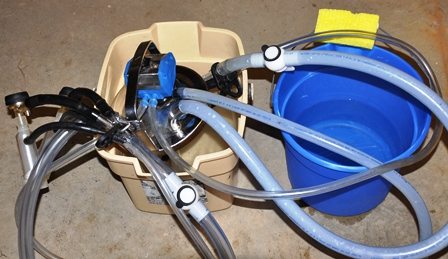
Step 1 – Prepare Your Cleaning Water For The Milking Machine
Wash your hands. Fill one five-gallon bucket with a gallon of warm rinse water and another five-gallon bucket with a gallon of warm water mixed with ½ cup of bleach. Take these out to the milking area – these will be used to clean the machine when milking is done.

Rinse Buckets For Cleaning the Milking Machine
Step 2 – Assemble the Milk Bucket
Get the milk bucket and place it next to the stanchion, position the silicone gasket in the milk bucket lid, place the milk bucket lid on the bucket, and pull the clamp up over the lid to clamp the two together.
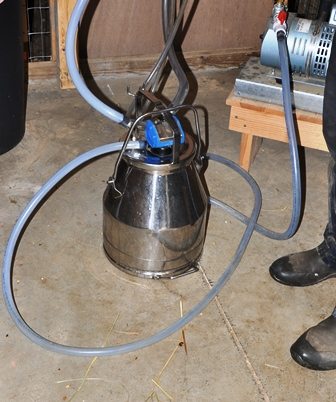
Milk Bucket With Lid Clamped On
Step 3 – Verify the Milking Setup Is Working Properly
Position the claw valve lever on the bottom of the claw (the assembly that gets attached to the teat) in the “up” position on the inflations and turn on the pump to make sure everything is working properly. The vacuum gauge should read about 10 – 12″ and the inflations should start suctioning after a few seconds.
Occasionally, I don’t get the gasket properly seated in the milk bucket lid, don’t get a good seal, and don’t get enough “suction” going – so I have to reseat the gasket to make sure there is a good seal and adequate suction.
Making Sure Everything Works Before Milking
Step 4 – Put Goat #1 In Stanchion & Feed
Put the first goat on the stanchion and give her the grain ration – this gives her something to do while she’s being milked and makes her look forward to being milked each time. Remember that goats prefer to be milked at the same time and in the same order every day.
Step 5 – Wash Udder & Strip Teats
Wash her udder (we use udder wipes) and express milk from each teat into a strip cup to assure there’s no issue with the milk (no blood, lumps, or anything unusual). This step is important because you check that the milk is ok and it also strips out the milk that’s most likely to contain bacteria (from lying in dirt/straw/etc.).
Step 6 – Start Milking
Start the pump, insert each teat into the inflation, and observe as milking starts. You should see milk coming through the inflations for about 3 to 4 minutes. When milk is no longer coming out, break suction on each teat and remove the inflation.
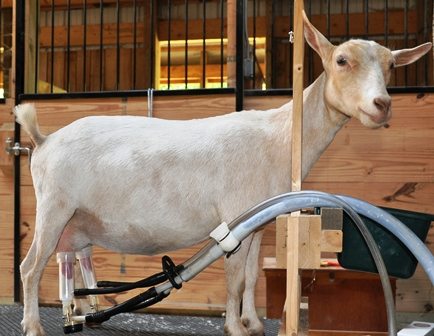
Machine Milking A Dairy Goat
Step 7 – Clean & Spray Udder & Teats
Clean each teat again and spray with FightBac (to prevent bacteria and mastitis). weigh the bucket to determine how much milk she gave (weighing is optional), and return her to the goat stall. We make sure they have fresh hay after milking so that they stand and eat for a while; this allows the wax plug to reform at the end of the teat before they lay down and minimizes bacteria.
Step 8 – Repeat For Each Goat
Repeat steps 4-7 for each goat that needs milking. Note that our setup (shown in these photos) can milk two goats at a time (two sets of inflations).
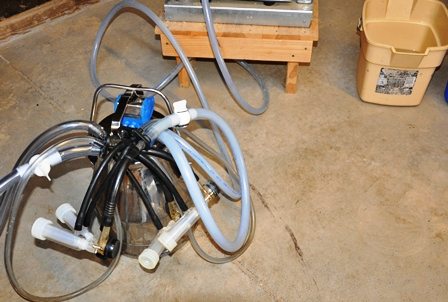
Step 9 – Disassemble Goat Milking Machine
Once everyone’s been milked, remove the lid from the milk bucket, place it on top of the rinse buckets, and take the milk bucket inside.
Storing the Lid/Inflations Prior to Cleaning
Step 10 – Bottle & Refrigerate Milk
Pour the milk through a funnel lined with a milk filter into sterilized glass jars, cap the jars, and refrigerate immediately. We never put warm milk into milk that’s already been cooled – we always try to cool the milk as quickly as possible and don’t want to rewarm it.
Step 11 – Rinse Milk Machine With Warm Water
Return to the barn, put the lid back on the milk bucket, position the claw valve lever on the bottom of the claw in the “down” position on the inflations, place the inflations in the warm water rinse bucket, and turn the pump on. Suction all the warm water from the bucket into the milk bucket, turn the machine off, remove the lid, and discard the warm rinse water.
Step 12 – Rinse Milk Machine With Bleach & Store To Dry
Repeat step 11 with the water-bleach mixture; except, after suctioning the water-bleach mixture through the machine and into the milk bucket, remove the lid, and hang it and the inflations to dry. Remove the gasket from the lid and place it in the bleach-water mixture in the milk bucket. Wipe down the inside of the lid with the water-bleach mixture, wipe down the top and inside of the milk bucket with the water-bleach mixture, and remove the gasket from the bucket and hang to dry. Discard the water-bleach mixture and hang the milk bucket to dry.
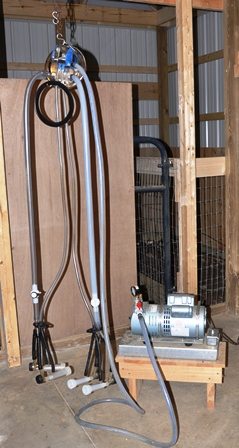
Milk Machine Drying After Cleaning
Step 13 – Clean-up Milking Area
Clean-up the milking area as necessary – that’s it!
Robin says
Thanks so much for sharing your knowledge & experience…very helpful as I research for a milking machine.
Elise says
How much was the machine?
Lesa says
We bought our milking machine several years ago, but I think that it was around $1000. Not inexpensive, but we have certainly used it heavily and it has reliably supplied a lot of milk.
Lesa says
Veronica, our milk does not have an aftertaste that is different from cow milk – everyone that tastes our goat milk for the first time agrees on this and even those that thought they would hate it, like it. What goat milk tastes like depends strongly on the breed of goat and proper handling of the milk. Nigerian Dwarves are considered by many to produce the best tasting milk, it’s the highest in butterfat content and so is quite similar in taste to cow milk. I wrote a post on goat milk taste that you might want to read: http://www.betterhensandgardens.com/2012/08/12/what-does-goat-milk-taste-like-anyway/ By the way, I’ve never gotten any goat milk from the grocery store that I’d drink either – if that’s where you got it.
Melody Grove says
We have a very small herd and have not taken this “next step”. Though I have everything, including the facilities to do this. You have mentally helped me make a big leap into the realm of possibilities. Can you give us more information on the decision making process for the model of pump and distributor? Also do you consume the milk or make milk products from the milk. Also do you keep records on the weight of the milk, etc.? Thank you so much for the continued inspiration to develop our skills and enjoy the process!
Lesa says
Melody, we looked at many models, but eventually went with a DP120 unit from Perry’s Milkers: http://www.perrysmilkers.com/ The model we got has a rebuilt pump but everything else is new. The rebuilt units from Perry’s are not inexpensive, but were significantly cheaper than new models of similar units. A friend of mine purchased a unit from them several years ago and recommended them, so we felt comfortable that the rebuilt aspect wouldn’t be a problem and that it should last for many years. We consume the milk, make yogurt & cheese, and make goat milk soap. I do keep records on the weight of milk each girl produces every day, and plan to do a post on this soon. Thanks for letting me know you find the blog helpful – it inspires me to keep sharing!