 Winterizing the vegetable garden is an important fall activity that will help ensure success in your garden next year.
A few hours of work now will make a huge difference in making your future garden a success.
If you have chickens, they can be surprisingly helpful when it’s time to prepare your garden for winter.
Chickens are not generally a good addition to a growing garden because they eat just about anything green, but they can be a valuable asset in fall.
Letting your chickens loose in your fall garden is healthy for them and they’ll happily winterize your garden for you.
They will clean up the spent vegetable plants, eat bad bugs and grubs, spread compost, aerate the soil, and spread mulch to protect the ground over winter.
Winterizing The Vegetable Garden – 3 Easy Steps
1) Destroy Plant Debris
By the time fall rolls around and a few touches of frost have hit, what’s left in our garden looks pretty awful (see photo below – I’m embarrassed at how bad it looks!).
But, now’s the time to remove and destroy (not compost) all the remains from this year’s vegetable plants.
It’s important to remove and destroy the old vegetation because many vegetable pests survive from year to year on old plant debris.
Being careful about removing plant vegetation helps prevent insect and disease problems from starting next spring and summer.
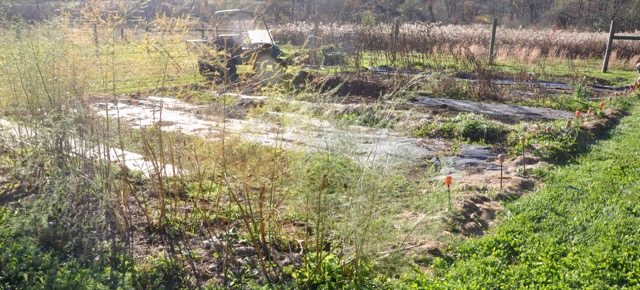
Messy Fall Garden That Needs Vegetation Removed
If you’re using chickens to help, chickens eat growing green plants voraciously and they’re no different when turned loose in a garden. This can be an advantage for both you and your chickens if you let them into the garden after you’ve harvested everything that you want. It won’t take long for a small flock to completely clean up all the spent vegetation and any unpicked vegetables.
But if you have plants that you’re planning to continue harvesting through winter such as carrots or kale, you’ll need to fence that area off to protect it from the chickens. Or, you can control your chickens’ garden cleanup by using a chicken tractor and locating the chickens where you want them in your garden.
Chickens can safely consume most garden vegetation in fall; however, they should not be allowed to eat plants from the nightshade family or rhubarb.
Common garden plants in the nightshade family include tomatoes, peppers, eggplant, and potatoes (sweet potatoes are not from the nightshade family). These plants should be pulled and removed from the garden before allowing the chickens in because they contain solanine, which can have serious health consequences if consumed by chickens.
Rhubarb is a perennial so you don’t want to remove the plants but they do need to be fenced off. The leaves are toxic and should not be consumed by chickens or humans.
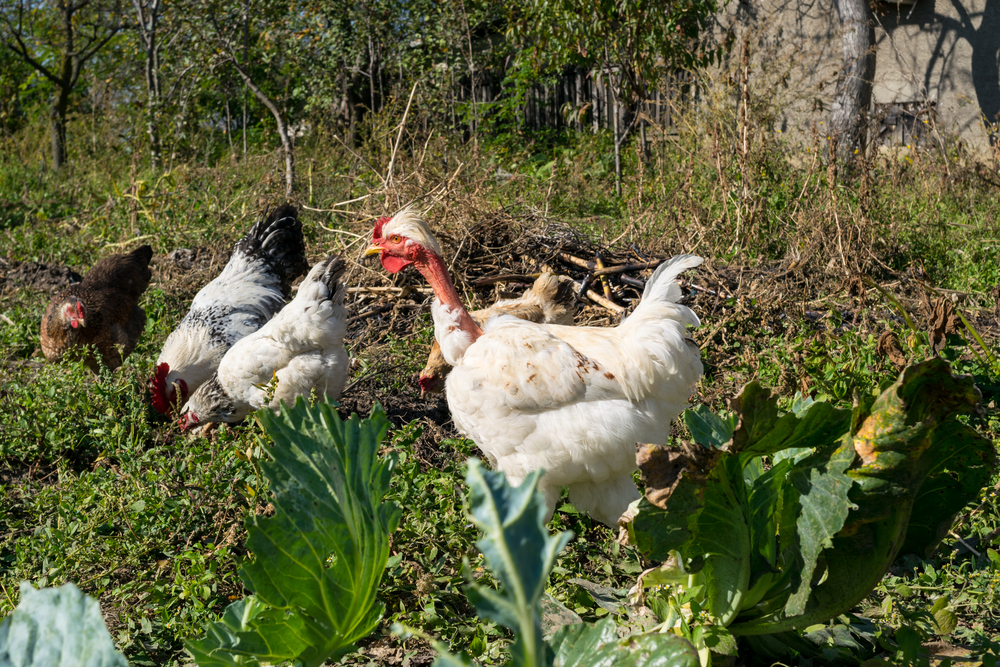
Chickens Winterizing the Garden
2) Add Compost (Fertility)
Once the garden has been cleared of spent vegetation, then it’s a good idea to add compost to help replenish nutrients in preparation for next year’s garden. I add a layer of well-composted manure to each garden bed. For more on how we use compost see: Why Composting Is Good For Your Garden.
If you save and compost the soiled bedding material from your chicken coop it makes terrific compost for the garden. Chicken droppings are very high in nitrogen, which is one of the main nutrients that need to be replenished yearly in the garden. But, adding chicken droppings directly to a growing garden can burn plants because nitrogen levels are so high. By composting the old chicken litter from the coop and adding it in the fall, it will enrich the soil during the winter and mellow sufficiently by spring to be safe for planting.
In the photo below, I’ve added compost to the first half of the bed – you can see how dark and rich the compost looks compared to the rest of the soil. The compost returns nutrients (particularly nitrogen) to the soil and helps ensure rapid and lush vegetable growth in next year’s garden.
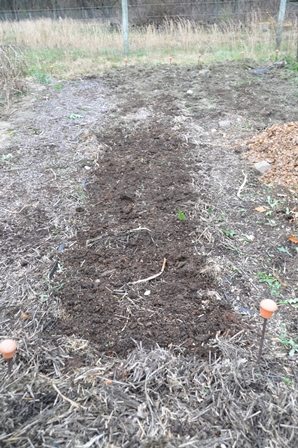
Compost Added To 1/2 Garden Bed
In addition to supplying the nitrogen-rich chicken litter for the garden, your chickens can help you spread the compost. Just place piles of litter at regular intervals in your garden rows or beds and turn the chickens loose. They will enthusiastically work through the compost and spread it out for you.
3) Cover With Mulch
After the old vegetation is gone and the compost has been spread, it’s beneficial to add a thick protective layer of mulch to the garden. This will help keep everything (particularly moisture and nutrients) in place. Again, the chickens will be happy to spread the mulch.
This can be grass clipping, chopped leaves, or whatever mulch material you have readily available. Just make sure the mulch material is free of pesticides or herbicides that you wouldn’t want contaminating your homegrown garden produce. This mulch layer is not intended to add nutrients back into the garden but simply to hold the soil in place and prevent weed seeds from germinating.
Then in spring, you can remove the mulch layer and immediately start planting. The garden rows will have already been replenished with the nutrients from the compost and should be nearly weed-free because of the heavy mulch layer.
The picture below shows the leaf mulch additions to the first half of the bed.
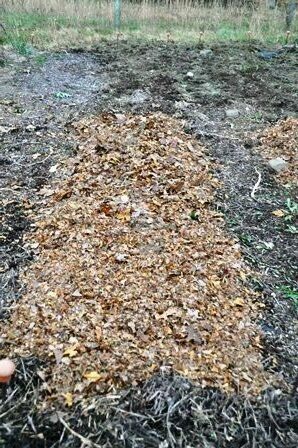
Mulched 1/2 Garden Row
Additional Chicken Benefits
While your chickens are eating your old garden plants and spreading compost or mulch, they will provide additional beneficial services by eating insects, aerating your garden soil, adding more nutrients, and eating weed seeds.
Chickens are omnivores, meaning they will eat both plants and animals. They are particularly fond of insects and will eat bugs, grubs, and larvae as they are scratching and pecking through the garden. By eating the larvae and grubs of “bad” insects that are planning to overwinter in your garden (like Colorado potato beetle larvae, etc.) they can significantly reduce the insect load in next year’s garden. Using chickens to reduce the number of insects that will emerge in spring to eat your harvest is a smart method for organic pest reduction.
As the chickens look for grubs and eat the old garden vegetation, they will naturally aerate the garden soil and add nutrients with their droppings. Although their fresh droppings are very high in nitrogen and can burn plants, by adding them in the fall the droppings will diminish in potency over winter and provide increased plant fertility in spring. Chickens also gently work the top few inches of soil as they scratch and improve the soil texture while introducing oxygen. This promotes optimal planting conditions when spring arrives.
Finally, as your chickens’ peck and scratch through your fall garden, they will eat the weed seeds that they uncover. This can significantly reduce the number of weeds that germinate in springtime after the mulch layer has been removed. Of course, fewer weeds mean less work in the busy springtime garden.
Just by turning your chickens loose in the fall garden, you can put the vegetable garden to bed, protect it for winter, and get an advance start on spring preparations with minimal work on your part. It provides healthy activity and food for the chickens, who will whole-heartedly enjoy doing the chores for you.
What Winterizing The Vegetable Garden Creates
When we began with these garden beds, the soil was compacted clay, and difficult to work or grow.
But after just a couple of years, by following these 3 easy steps, the improvement in the soil has been incredible. The soil is now friable and easy to work on. The garden also produces some amazing produce for us and the number of bad bugs (insects that eat your crops) has decreased dramatically.
It takes some work each fall, but the garden just gets better every year!

Winterized Vegetable Garden
The photo above shows the vegetable garden after the removal of spent vegetation, composting, and mulching. The winterizing steps will help ensure an insect-free and fertile garden next year.
Soon, the seed catalogs will be here, and I can fantasize about next year’s garden. Knowing I’ve done the cleanup and added the fertility needed to make it spectacular.
Doreen says
These are great tips for winterizing vegetable gardens. I would also like to add that adding a protective structure, like a geodesic dome, can create an optimal environment for growing vegetables.
Walter Langely says
I agree on the no-till method. I do what I name “lasagne ” composting in the fall with leaves and with newspaper and Old straw after planting within the Springboard