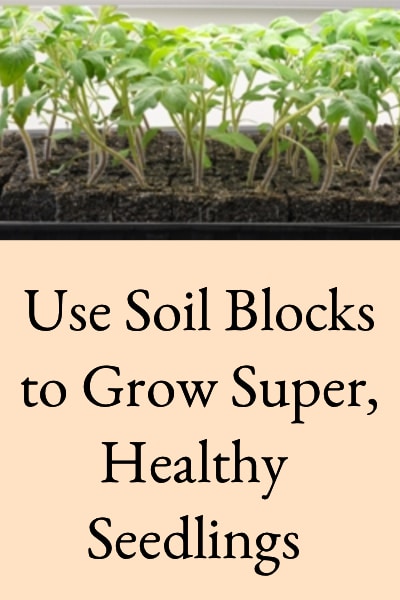
Starting vegetable seedlings indoors is a tried and true method for getting earlier production and increased yields from our gardens. But, traditional seed starting systems can be discouraging.
They are often messy, costly, time-consuming, and produce seedlings that suffer from transplant shock and retarded growth when moved to the garden. Fortunately, there is a better way! Soil blocks are an easy method for starting transplants, and they produce healthier seedlings that grow faster.
They (soil blocks) were specifically developed to be a more efficient way to start seedlings, and extensive research in Europe has shown that transplants grown in them are superior to plants grown in flats or containers.
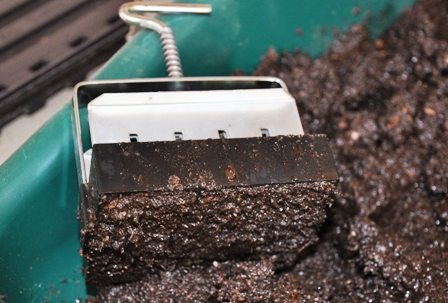
Soil blocks are made using a soil mix that is compressed into a block by a forming tool. A small depression is formed in the top of each block when they are made, and one or two seeds are placed in the depression to grow each transplant.

Tomato Seedlings Germinated in 3/4″ Pots After Potting On Into 2″ Blocks
Individual containers or pots are unnecessary when using soil blocks for starting seedlings, and they offer other exciting advantages over traditional seed starting systems as well.
Why Use Soil Blocks to Grow Super Healthy Seedlings?
PREVENTS TRANSPLANT SHOCK
The roots of seedlings grown in plastic or peat pots grow to the edge of the pot, and then begin circling the container walls. When transplants are removed from the pots, the roots suffer “shock” as they are ripped away from the container, exposed to air, and set into the garden. The roots of seedlings grown in flats suffer similar damage because they also grow outward, and are “shocked” as they are pulled apart and planted in the garden. In both methods, plant growth is arrested as they try to recover.
Roots of soil-block-grown seedlings initially grow toward the outside of the block, but when they hit the outer edge they turn inward to avoid the air at the surface (called “air pruning”). Consequently, the roots are not ripped away from a pot or each other, are not damaged, and there is little or no “shock” when they are set into the garden. You don’t have to un-pot or uproot the plants; you just drop the blocks into your planting holes.

2″ and 3/4″ Soil Blockers
LESS EXPENSIVE AND SUSTAINABLE
Peat pots, plastic containers, or flats for starting transplants aren’t needed when using soil blocks, so the only cost is the initial cost of the forming tool. The forming tools themselves are very durable and last for years, so over time, the cost per soil block becomes minuscule. There is also no need to disinfect pots prior to starting seeds, clean them after transplanting, or find a storage room for them from year to year.
FASTER AND MORE EFFICIENT
Soil blocks take less space in plant trays so more seedlings can be grown, block creation is fast because the blocking tools make multiple blocks at a time, seeding is quick because the blocker automatically creates a seed depression, and transplanting is swift because seedlings don’t need to be removed from pots.
2″ Soil Blocks with Depression for 3/4″ Soil Blocks
SUCCESS WITH MORE VEGETABLE VARIETIES
Some vegetables are very difficult to successfully transplant because they are so sensitive to root shock; however, many of these difficult varieties (such as cucumbers, squash, watermelon, cantaloupe, corn, beets, and other “sensitive” or tap-root crops) can be transplanted when using soil blocks because shock is so minimized. In Northern or short-season climates, this means that crops that were previously impossible can be grown.
CONVENIENT “POTTING ON”
Soil blocking tools come in several sizes so transplants can be moved into larger blocks over time for even hardier seedlings (a technique referred to as “potting on”). The most popular sizes for gardeners are the ¾” and 2” size, but there is also a 4” size. The system is designed so that seedlings started in the ¾” mini-blocks can be easily transplanted into the 2” block, and transplants growing in the 2” block can be moved into the 4” maxi-blocks (see diagram below). This is done by using “inserts” when the blocks are formed, which allow smaller blocks to be dropped into the larger blocks thereby promoting continuous seedling growth and robust transplants.
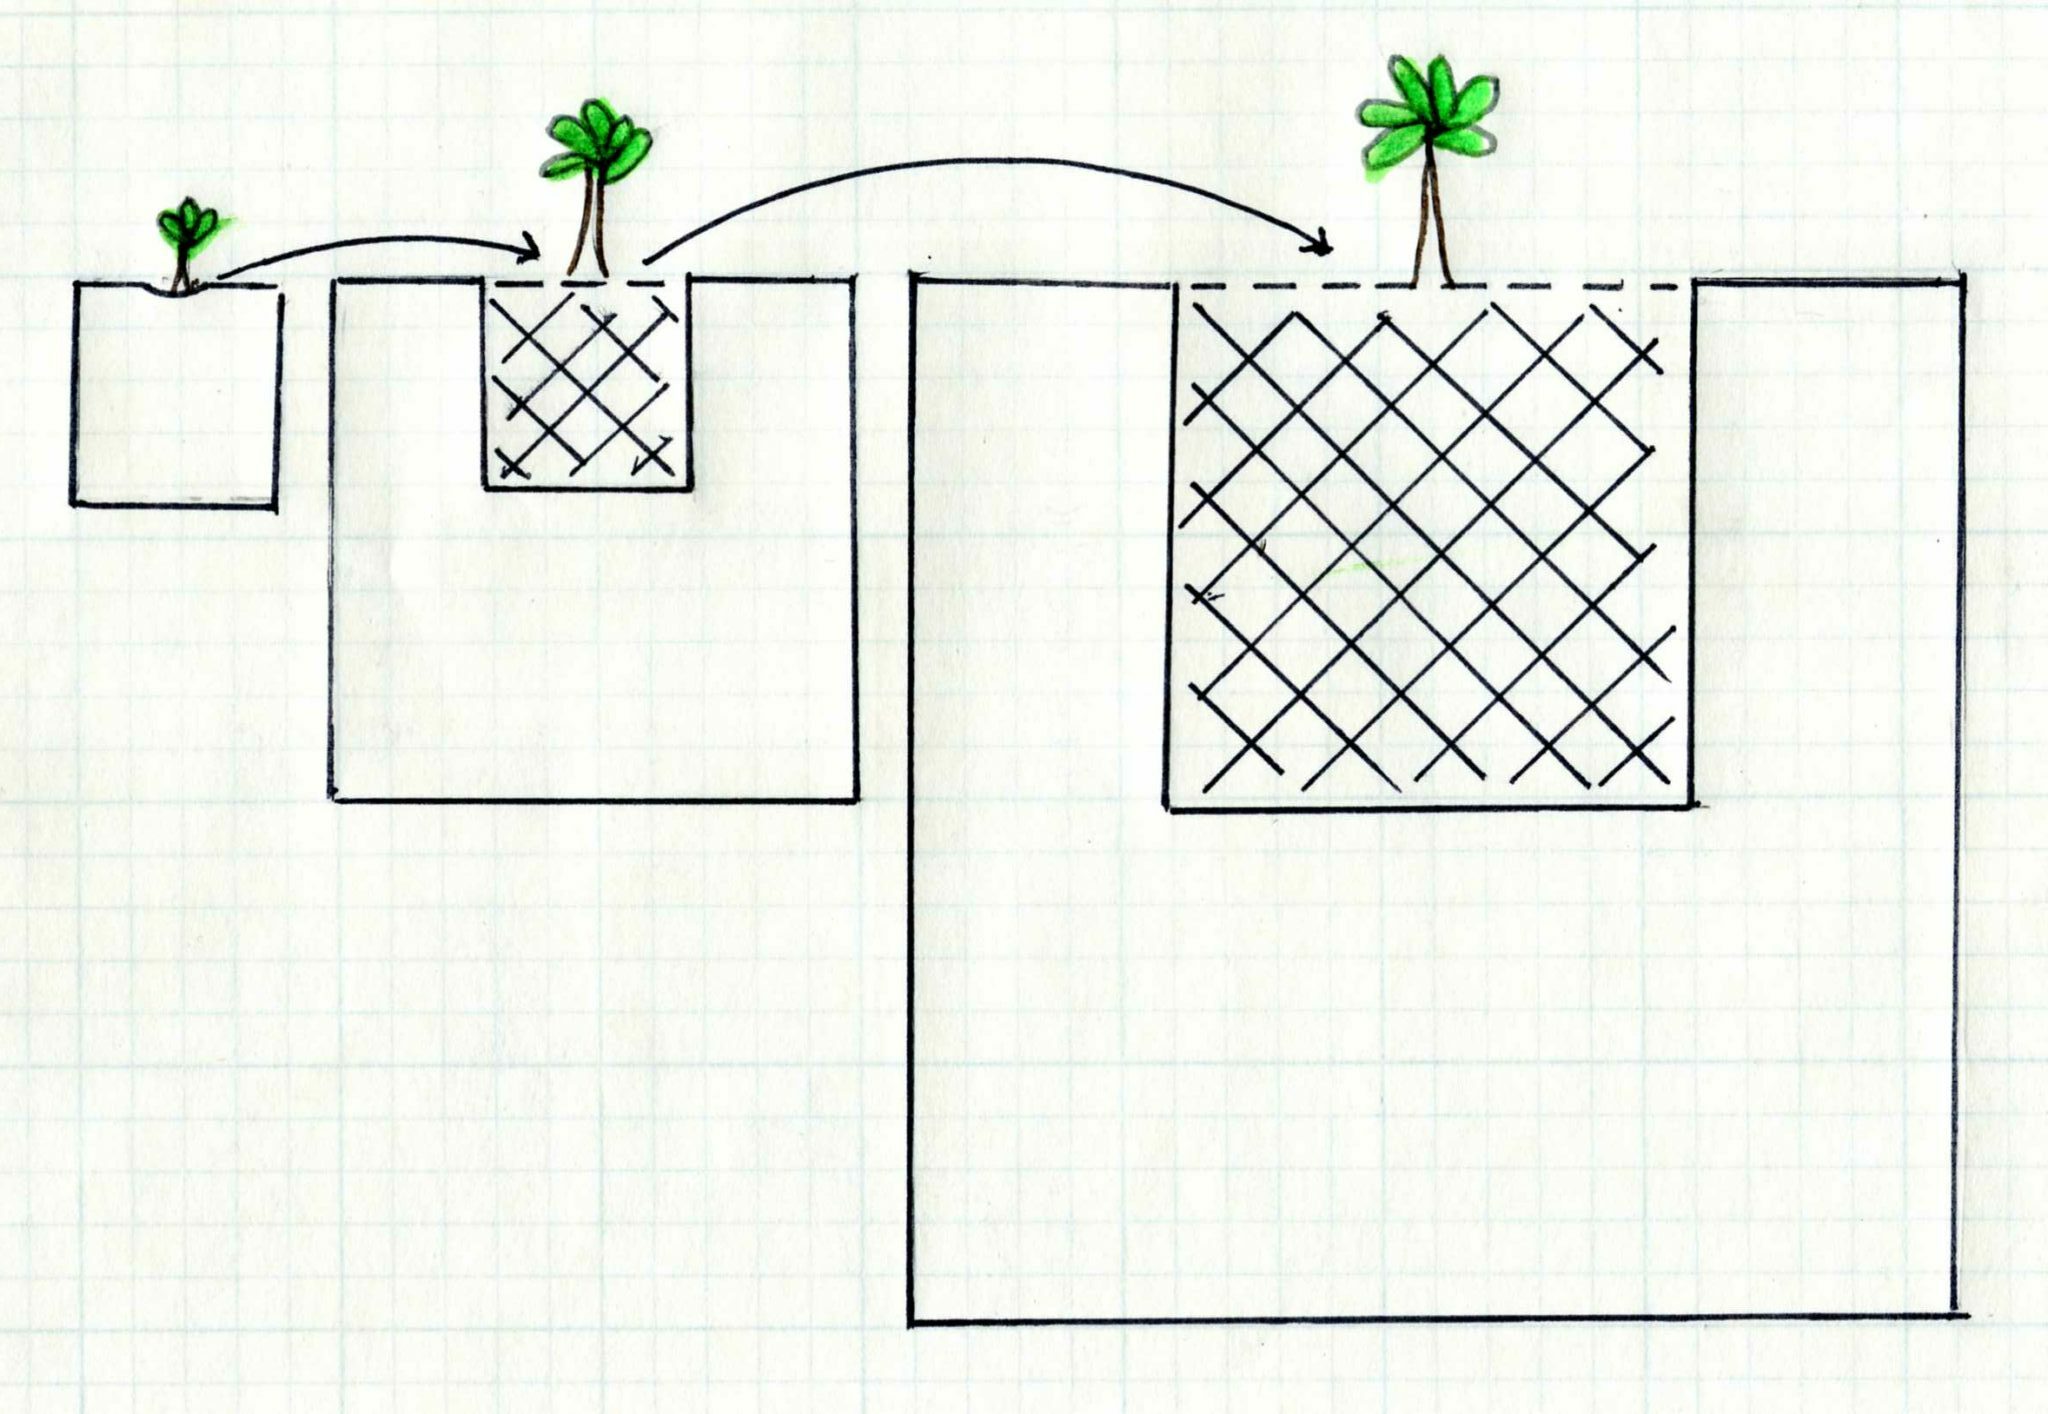
Progression of Seedling for Potting On – Seedling is germinated in 3/4″ block, then dropped into 2″ block made with 3/4″ insert, then dropped into 4″ block made with 2″ insert.
PREWATERED
With other methods of starting transplants, the pots or containers are filled with the dry mix, then the seeds are added, and then you have to get the mix uniformly moist. This is often difficult when using seeding mixes which are initially quite resistant to absorbing moisture. When using soil blocks to grow super healthy seedlings, the seeding mix must be thoroughly wet before making the blocks or they won’t hold together properly, so there’s not even a need to water the blocks for several days after the seeds are added.
Equipment For Making Soil Blocks
To make soil blocks, it is necessary to invest in a soil blocking tool or tools. The 2” blocking tool (or “blocker”) is the most versatile and is the size typically recommended for beginners. There are both stand-up and hand-held blocking tools available, but the hand-held versions are less expensive and more appropriate for urban farm use (the stand-up versions are suitable for market gardeners).
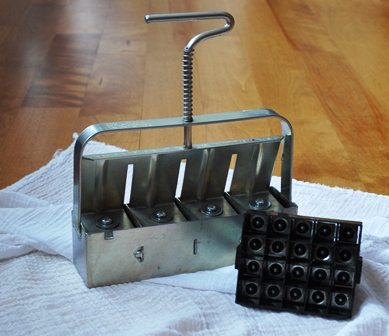
2″ and 3/4″ Soil Blockers
The 2” blocker makes 4 blocks at a time, can be used to start nearly any type of seedling, and costs about $40.00. The ¾” blocker makes 20 blocks at a time, is used to start many transplants in very little space, and costs about $30.00. The 4” blocker makes only one block at a time and is the least versatile because it’s typically used to “pot-on” 2-inch blocks to grow large transplants of crops like tomatoes or peppers (it’s also about $100.00).
Soil Mix For Blocking
One critical element for creating successful soil blocks is the right soil mix. Not only must the soil contain the proper nutrients and retain water to support the seedlings, it must also be highly compressible and fibrous to maintain the block structure. Typical commercial potting mixes or garden soil do not meet these criteria, so making your own homemade mix often makes sense. The mixes are easy to make (see Homemade Seed Starting Soil Mixes) and use common garden supply ingredients.
Making The Soil Blocks
At first, making soil blocks takes a bit of practice, but after a few tries, they are quick and easy to produce. Just follow these steps:
- Put the soil mix into a tub and add warm water at a rate of approximately one part water for every three parts blocking mix. I like to let the mixture sit for about an hour to allow the water to soak in and then stir well. A thick oatmeal-like or wet cement consistency is what you’re trying to achieve.
Preparing to Make Soil Blocks
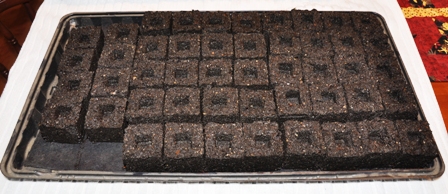
- Mound the soil mix to about 1 ½ times deeper than the height of the blocker, push the blocker into the soil several times to fill the chambers, scrape any excess off the bottom of the blocker, and set the blocker on your seedling tray (any flat tray with a lip around the edge works well).
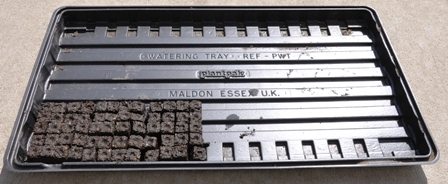
Partially Filled Tray of 3/4″ Soil Blocks
- Push down on the “T” shaped plunger while pulling the blocker frame up – you should have soil blocks! Rinse the blocker in warm water, and continue making blocks until your tray is full or you have the desired number for your seedlings. Shown below are the 3/4″mini-blocks and it only takes me about 15 minutes to make a whole tray full.

Filled Tray of 3/4″ Soil Blocks (420 Soil Blocks)
Germination When Using Soil Blocks
To start transplants in the blocks, add one or two seeds in the depression on top and follow the germination directions (usually on the seed packet) for thinly covering the seeds with soil (or not, some seeds germinate best uncovered).
The blocks contain lots of water after being formed, so it’s not necessary to water for the first two or three days, but they should not be allowed to dry out. Mist the seeds frequently to keep them moist, and supply bottom heat via a soil-heating mat to enhance rapid germination.
Once germinated, soil block seedlings just need plenty of light, water, and room for continuous growth to produce lush transplants. Initially, there is a small learning curve to using soil blocks, but there’s typically no going back to pots or flats afterward.
In Europe, it’s common for farmers and gardeners to buy transplants grown in soil blocks rather than pots or flats because flats or pots are messy. Soil blocks on the other hand are versatile and can be used in a variety of ways that fit your individual system and needs. Most importantly, they also produce healthy, robust, and faster-producing transplants.
Cockeyed Jo says
Lesa,
I so agree with you. As far as purchasing soil block makers, I have never bought one in 40 years of homesteading. I upcycle old prescription bottles for DIY soil block makers.
Joy says
I’ve always wanted to try these! You give me even more reason to want to do so!
WT Abernathy says
Hi Lesa!
Laggy seedlings have been our bane for years- I think trying out this system might be the solution we’ve been looking for. Staging the seedlings with re-potting before hardening also is a great idea to reduce shock to the young plants. Something to try in a few weeks-
Cheers for sharing:)
Lesa says
Strangely, it seems to work for me – will have to check into that. Anyway, you can find it here: http://www.betterhensandgardens.com/making-soil-mix-for-seed-starting/