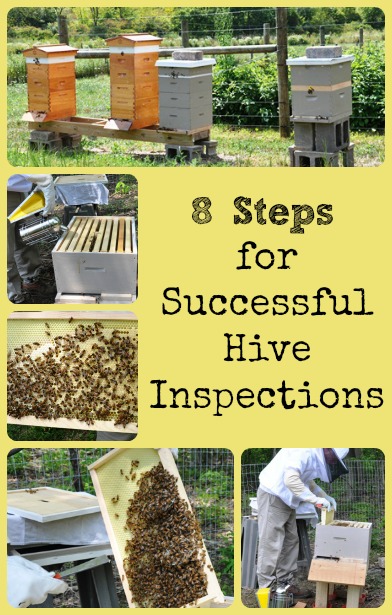
1) Watch the Front Door
It’s very important to regularly inspect your honey bee colonies (this means taking off the top and going into the colony), but the colonies should be visually checked daily too.
During the daily check, watch the hive entrance (front door) – you’re looking to identify healthy hive activity like lots of pollen coming in during spring. This means that there’s lots of protein coming in to feed brood and things are going well.
Also, watch for signs of trouble like hive robbing activity, yellow jackets, or skunks; these can kill a colony in a week if you’re not monitoring and taking action if there’s a problem.
If you regularly watch colony activity, soon you begin to recognize the healthy behavior as well as signs of trouble, and you can react quickly to protect the bees.
2) Have A Plan
When preparing to inspect the hive, make sure you have a plan before you start. Your job during a hive inspection is to go into the hive, make sure the queen is healthy, make sure she is laying, and add or subtract bee food and housing as necessary depending on the season.
Make sure you’re comfortable wearing your protective clothing (bee suit, gloves, and veil) and that everything is secure – bands around pant legs, drawstrings on veil tightened, etc. We have a friend who neglected to tighten the drawstrings on his veil for his first hive inspection, and was surprised when he got stung.
Especially at first, use the protective gear the way it was meant to be used! Remember that bees don’t like dark colors (they look like a bear to a bee), so don’t wear any – even dark glass frames can draw a bee’s attention. Have your smoker lit, and smoking well before approaching the beehive.
3) When & Where To Stand
When inspecting the hive, don’t stand in the path of bees flying in and out of the hive, have the wind coming from behind you if possible (so the smoke from the smoker naturally goes into the hive). Also, have the sun over your shoulder so you’re shadowing the hive – how would you like it if someone suddenly took the roof off your house and shined a bright light (sunshine) in?
Bees notice extremes, so move gently, not abruptly. The best time to do an inspection is when all the bees are out foraging – there won’t be as many around to get upset about the intrusion.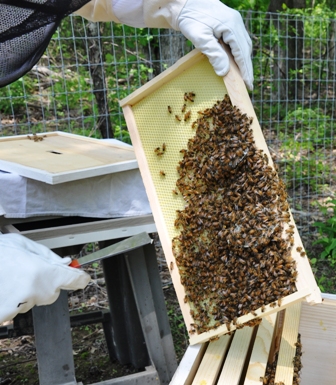
4) Listen, Watch, & Smell
As you approach the hive, listen, smell, and watch. You’ll learn to tell what’s happening in the hive not just by what you see, but by what you hear and smell too.
Then, gradually lift the roof and puff in a bit of smoke, wait a minute or two and then remove the top cover. Remember that bees communicate by smell, and the smoke interrupts their communication. The first thing they think when they smell smoke is a forest fire, so they load up on honey and a honey-laden bee is much less likely to sting.
You can over smoke a colony too if you over smoke and completely shut down communication, then they really want to sting. So smoke lightly. Generally, when you see them starting to line up on the frames looking at you, it’s time for another puff of smoke.
5) Preserve the Queen
The queen is the one bee that the hive must have, so be very careful not to crush or lose the queen as you’re doing the hive inspection (this is why it’s often a good idea to mark the queen, so it’s easier to find/preserve her as you’re doing inspections). And remember, she could be anywhere in the hive, so move very carefully and deliberately to avoid crushing or losing bees.
6) Examine The Frames
Once in the hive, examine frames the same way every time. For example, holding a frame in front of you, start in the upper left-hand corner, scan from the top to the right, scan down the right side, scan across the bottom to the left, turn the frame over and repeat. By getting in the habit of doing it the same way every time, you make sure that you quickly and consistently examine all the frames in your hive.

7) Verify Brood/Hive Health
When inspecting the frames, the larvae should be brilliantly white, and you should see a ratio of eggs to larvae to the sealed brood of 1:2:4 (because they are eggs for 3 days, larvae for six days, and sealed brood for 12 days).
Verify that the queen’s doing a good job laying (a good queen will lay between 1200 – 2000 eggs/day) and that there are no nasties (varroa, nosema, etc.) going on in the hive. Clean-up any excess propolis, add or subtract bee food and housing as necessary for the season and conditions you’ve observed, make sure bee space is being maintained, and close the hive back up.
8) Keep Records
Make notes on what you observed, how the queen was doing, whether new frames, supers, pollen patties, sugar water, etc. were added, and what the bees were bringing in. These notes can be a valuable resource in determining what worked and what didn’t as time passes.
Following these easy steps will ensure you’re well on your way to successful beekeeping, and if everything goes well in the colonies then it shouldn’t be long before it’s time to extract honey!
Recep says
Thanks for your valueable recomendations.
Lesa says
So glad you found these tips helpful!
RAMONA says
Lesa. Very sound advice. I’m a 3rd year bee keeper. They are my pets. 1st year hive they huddled and starved. 2nd year mites. This is my 3rd year and they are looking strong, like little kids on a playground. I’m I’m looking forward to harvesting honey. 3rd time’s a charm. Thank you =]
Lesa says
Hi Ramona, glad to hear things are going well for you this year. It’s so great to get the honey 🙂
Vivian Black says
You made a great point about having a plan to make sure you don’t get hurt or hurt the hive. My husband and I are looking for a bee control service that can help us with the bees who have chewed into our home. We will keep these tips in mind as we search for a professional that can help us best.
BENJAMIN says
Very impressed thank you
BENJAMIN says
I am very interested in farming bees….how ever how do I find or protect bees from diseases and what medical treatment is needed to protect the bees
Karen Tomlins says
WHERE DO YOU GET QUEEN BEES FROM? I AM THINKING OF GETTING A HIVE.
Lesa says
Hi Karen, Try contacting your local beekeepers association – they usually know who’s got queens for sale.
Eric Grandon says
You mentioned smell in your approach to the hive. What exactly are you trying to smell as you look and listen. I would think any abnormal smell would mean it’s way too late to inspect anyway.
Lesa says
Hi Eric,
You’re trying to recognize the different ways that the hive smells depending on what’s happening in the hive, what’s blooming, etc. If you become good at it, there’s a great deal you can tell about your bees from the way the hives smell.
Andabati jacob says
thanks 4 good work done.
Samwel Omondi Omolo says
Am begining to keep bees how long do i wait to inspect..
Lesa says
After you release the queen, probably a week later you should go back in and make sure she’s doing ok and is laying eggs.
becky says
How many eggs should be there in about a week?
Lesa says
Hi Becky, As the post says, a good queen will lay between 1,200 – 2,000 eggs per day.